|
How to use a template with Photoshop Elements.
|
Instructions on how to copy and paste images onto a pendant template. (Click on the images to enlarge/shrink)
Before you start work with template save a copy of the template in a folder as a saved file without any changes made.
Step 1 Open Photoshop Elements
For those new to the Photoshop Elements software for the first time, this is the ideal tutorial. With my Step by Step instructions from start to finish supported with the actual Photoshop software, you can go from being a novice to an expert in a matter of minutes. This template helps you give your images the professional touch.
Now let us begin.
Open your Photoshop Elements. Click 'Edit"
Loading...
![]()
![]()
DigitalTemplates.bestpeople.ca 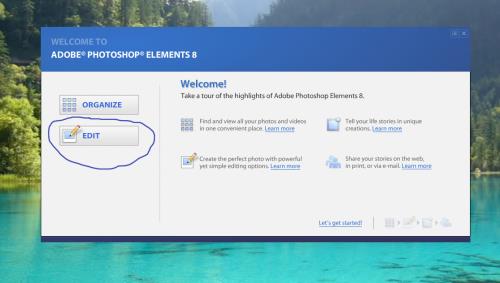
Your screen will look like the picture shown below:
Loading...
![]()
![]()
DigitalTemplates.bestpeople.ca 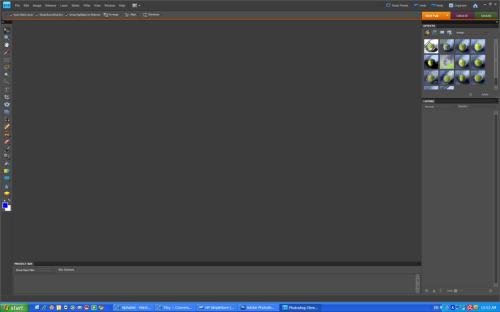
Step 2:
Open a collage sheet from your folder containing the image you would like to paste onto your template. File » Open. :
Loading...
![]()
![]()
DigitalTemplates.bestpeople.ca 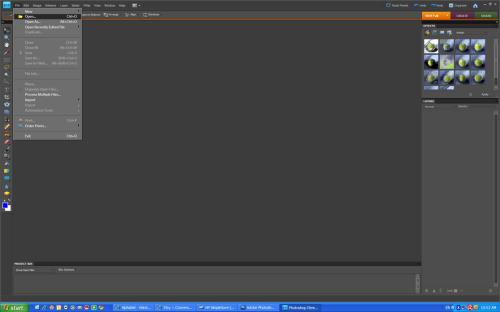
Your screen will look like the picture shown below:
Loading...
![]()
![]()
DigitalTemplates.bestpeople.ca 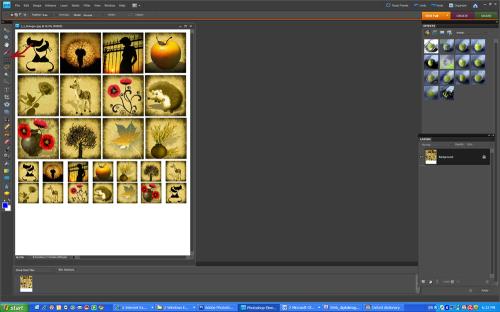
Step 3
Select the image you want to paste. Follow the steps shown below:
In toolbox click on the Marquee Tool. The Marquee Select Tool is the 5th icon on the toolbox (marked with a red arrow on the picture above).
Select the image you would like to paste onto the template. Click beside upper left image corner, hold, and move the mouse to right down image corner to select the image.
Loading...
![]()
![]()
DigitalTemplates.bestpeople.ca 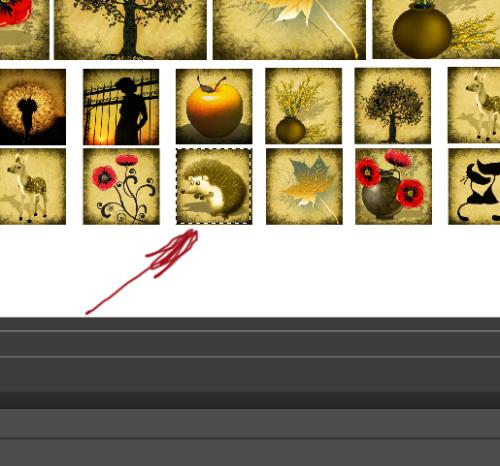
Step 4
Copy the selected image. Hold together both keys Ctrl+C or alternatively click Edit » Copy
Step 5:
Open pendant template like this: File » Open. :
Loading...
![]()
![]()
DigitalTemplates.bestpeople.ca 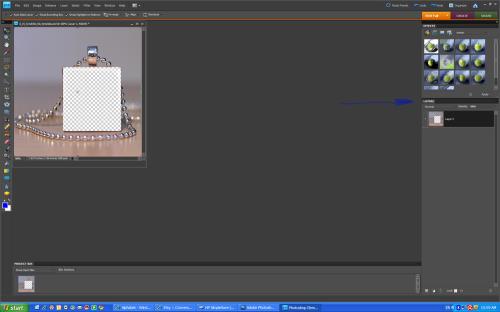
Make sure you have LAYERS window. See picture above (blue arrow)
If not click Window -> Layers. See the picture below.
Loading...
![]()
![]()
DigitalTemplates.bestpeople.ca 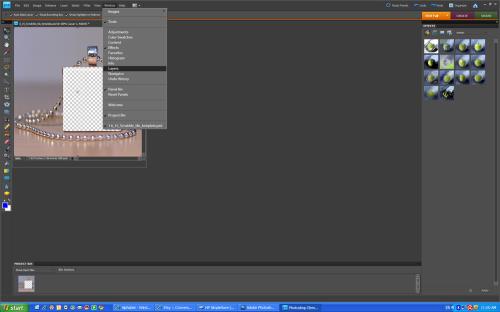
Step 6
Paste the image into the template.
Hold together both keys Ctrl+V or alternatively click Edit » Paste.
Your screen will look like the picture shown below:
Loading...
![]()
![]()
DigitalTemplates.bestpeople.ca 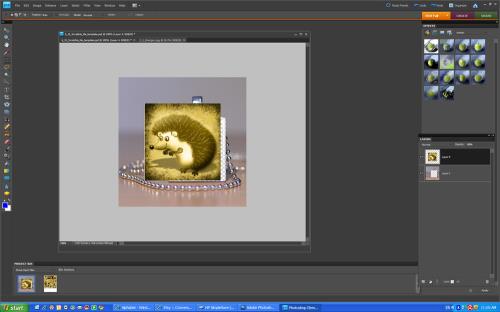
Now you can see the new layer with your image in the Layers window.
Step 7
Now it is time to move your image down into the right position. Select the layer with your image in the window LAYERS. Click Layer->Arrange->Send to Back. See the picture below.
Loading...
![]()
![]()
DigitalTemplates.bestpeople.ca 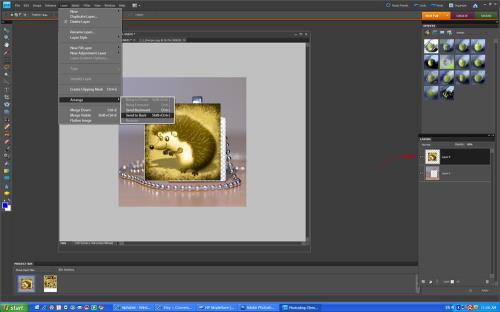
Step 8
Resize your image to fit onto the template. Make sure to select the layer with your image in Layers window. Then select Move tool in Toolbox as shown in the photograph below:
Loading...
![]()
![]()
DigitalTemplates.bestpeople.ca 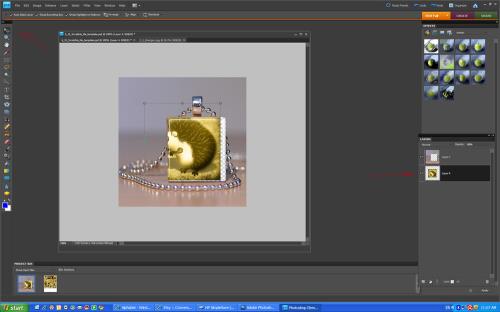
Resize the image if needed by pointing your mouse on small reqtangles, click, hold, and move. When you satisfied with your work double click the mouse on your image to finish that step. See the image below:
Loading...
![]()
![]()
DigitalTemplates.bestpeople.ca 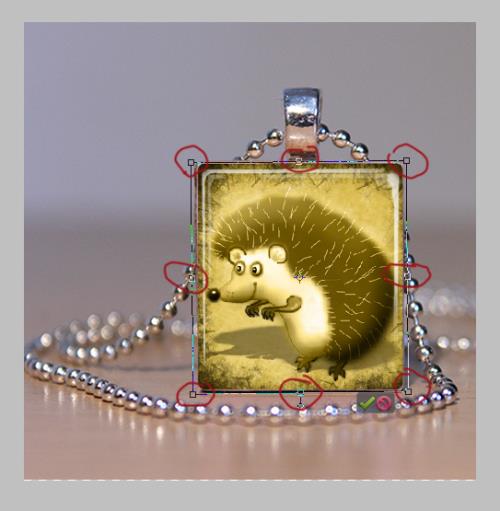
Step 9
Save your image.
To save your image, go to File » Save for Web. Click OK. In the window Save Optimized enter the file name, select folder you want to save your image in and then click the button 'Save'.
Loading...
![]()
![]()
DigitalTemplates.bestpeople.ca 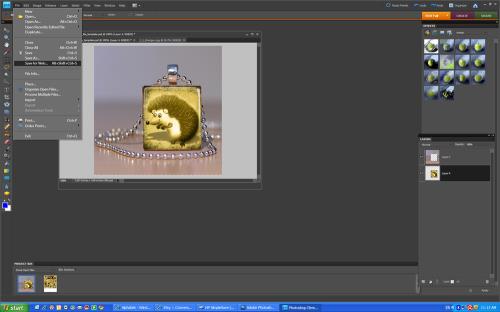
Now you have your chosen image of on the pendant template as shown in the photograph below:
Loading...
![]()
![]()
DigitalTemplates.bestpeople.ca 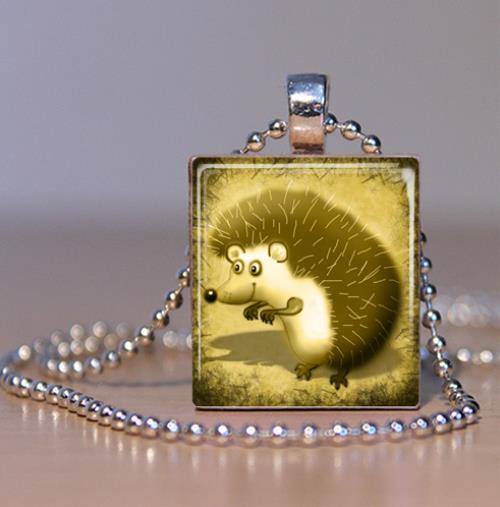
If you want to make insert another image, then delete the layer 'Your Image'-> click on the layer in the Layer box, click the trush button. See the image below:
Loading...
![]()
![]()
DigitalTemplates.bestpeople.ca 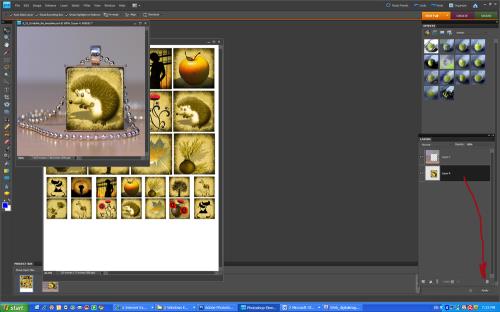
You are now ready ‘to create’ a professional new pendant image.
Enjoy!
If you have any questions you can get in touch with me on Contact Us page
|