|
How to change an object color in GIMP 2.8.4.
|
If you don't have GIMP 2.8.4 you can download it from here
Please be advised this tutorial is usefull for templates that specially designed for that. They are in PSD format and have separate layers for element whose color could be changed. They are marked as "Add your own color" in our Templates Shop.
Before you start working with the template save a copy of the template in a folder as a saved file without any changes made.
Open GIMP. Open the template.
As you can see the template has 2 layers. Layer Cord and Layer Template.
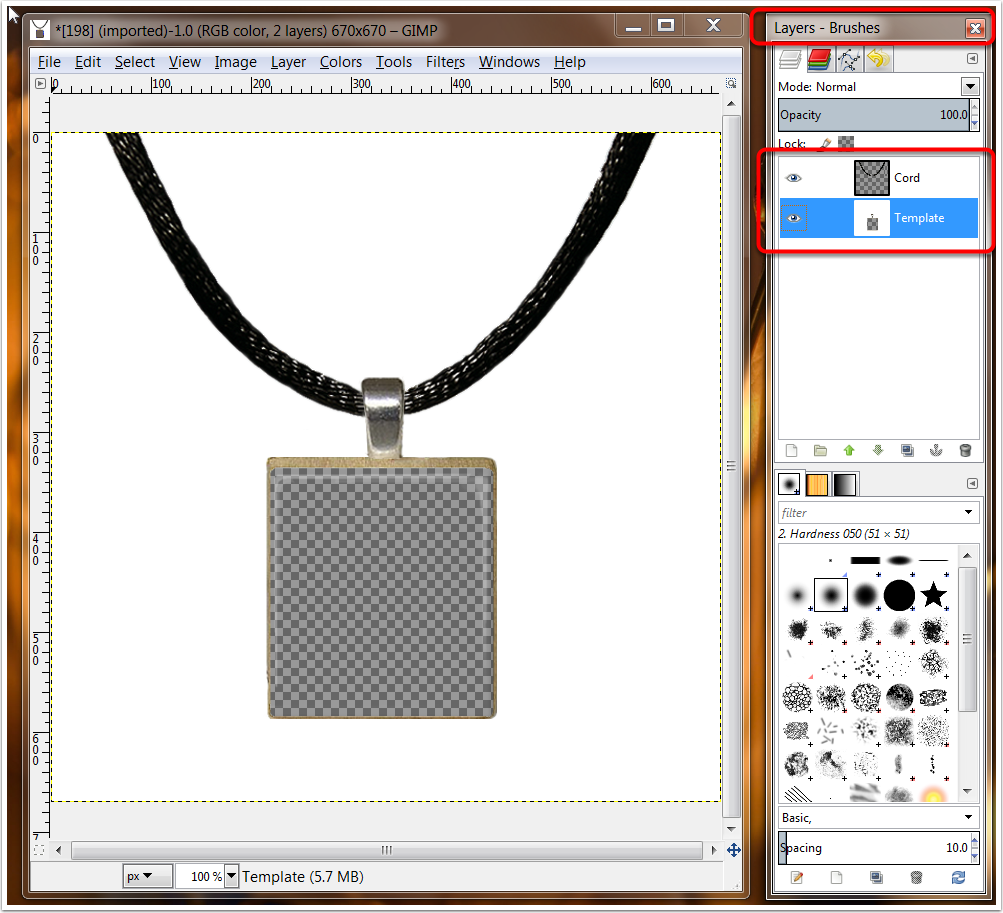
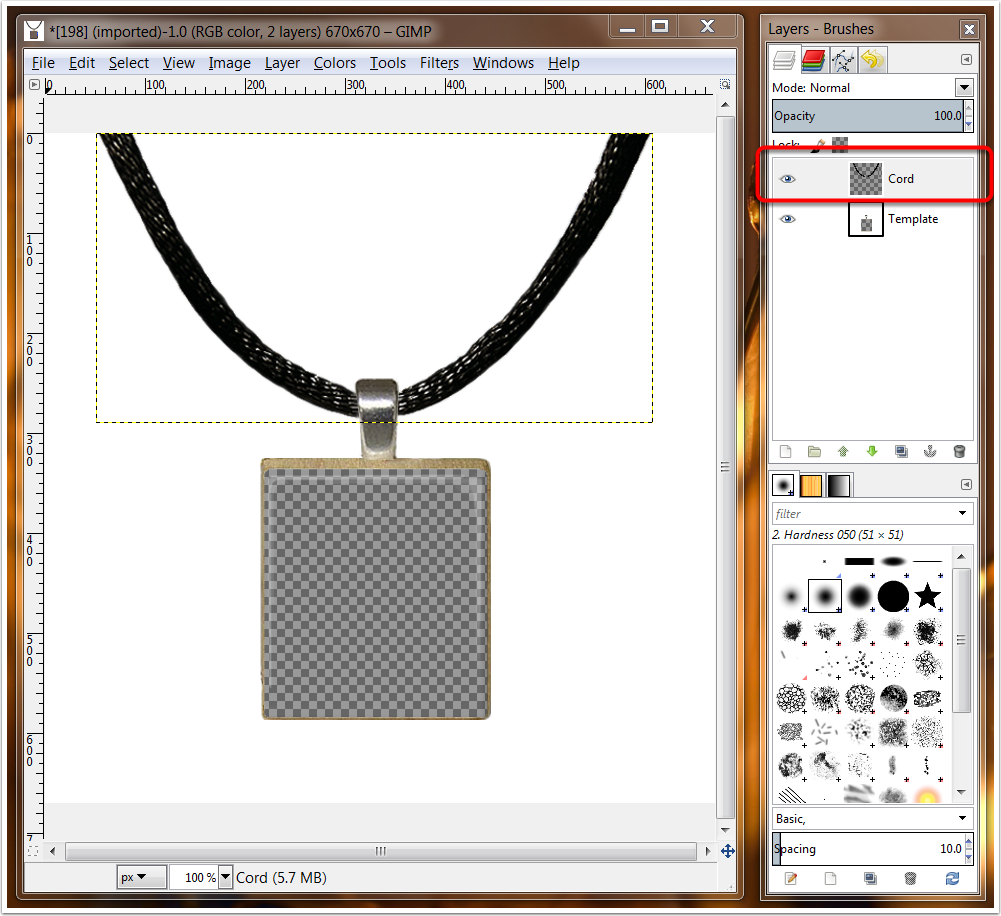
Click on the layer Cord to make it active.
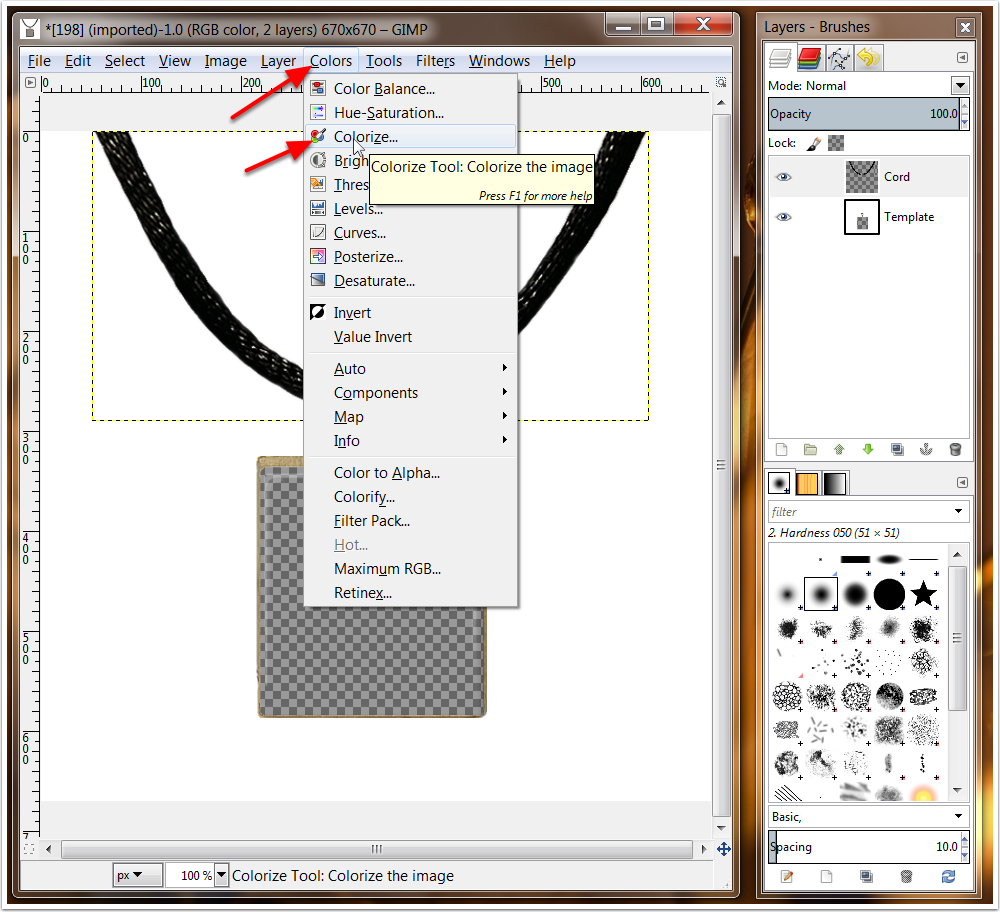
Open Colorize Tool. Click Colors -> Colorize.
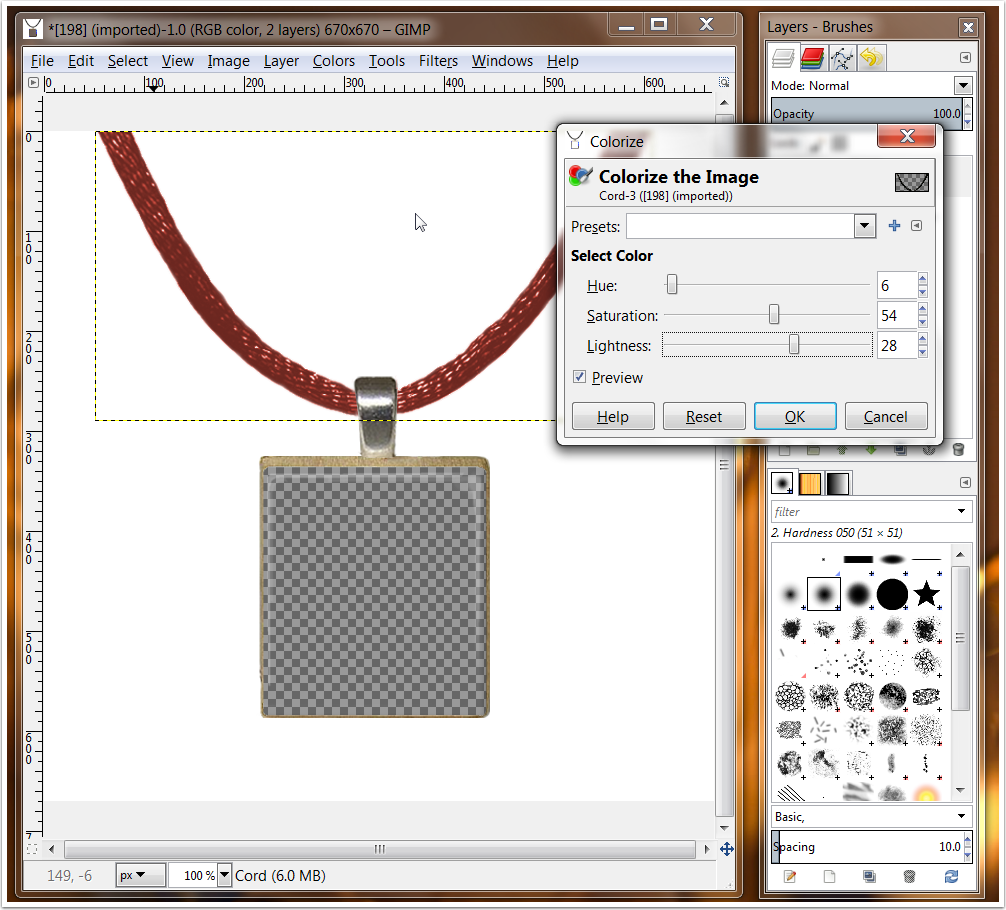
Colorize tool will be opened in a pop-up window. Move sliders in colorize tool to achive the cord's color you need. Click OK button.
Save new template as PSD or PNG under a new name. Click File -> Export.
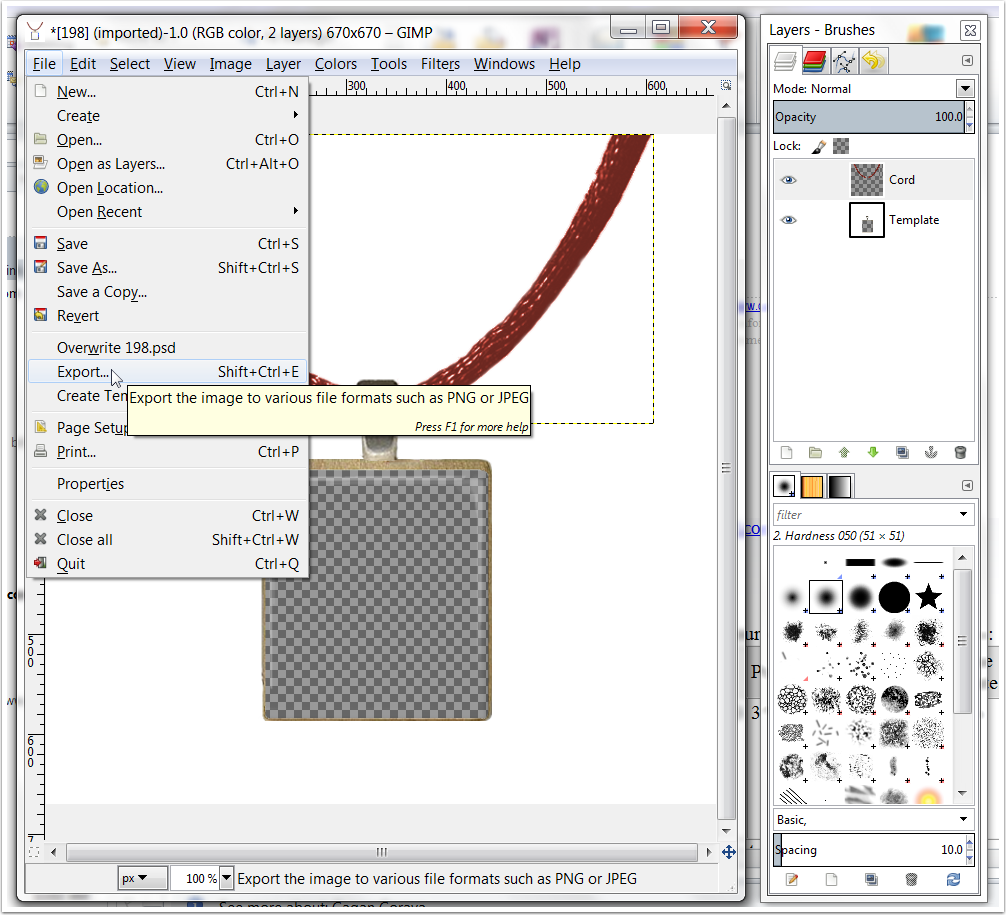
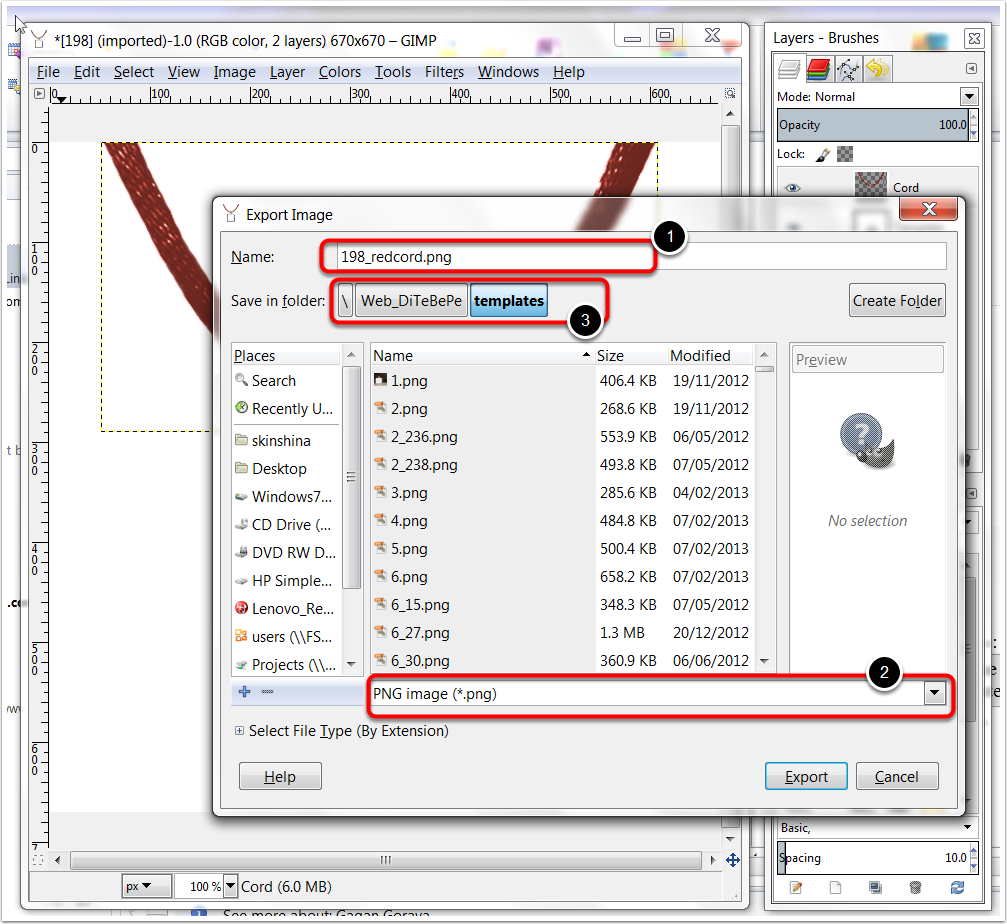
I saved the new template as 198_redcord.png (1). You can select PSD format in dropdown list if you prefer and save the template as PSD file (2). The file will be saved by default in the same folder where your original template is located. You can change the folder if you want (3).
You can open colorize tool again and change cord's color to brown for example. Repeat all next steps to save new 198_brown.png template. Change the cord's color as many times as you want. Use these new templates to represent your necklases to potential buyers. Just add your own images or free images from Images for craft projects by BetPeople.Ca
Enjoy!
If you have any questions you can get in touch with me via Contact Us page.
Alexandra
|